Grafting is one of the oldest and most effective methods of plant propagation. Used by horticulturists and gardeners alike, it allows you to combine the best characteristics of two compatible plants—typically for improved fruiting, disease resistance or ornamental value. Though the technique takes practice, it can produce reliable, long-lasting results when done with care.
Here’s everything you need to know to get started with grafting in your own garden.
ALSO SEE: How to use coconut coir in your garden for better soil and healthier plants
What is grafting, and why does it work?
At its simplest, grafting is the process of joining two plants so they grow as one. The plant that provides the root system is called the rootstock (or simply ‘stock’), while the piece being grafted onto it is known as the scion. For the graft to take successfully, the vascular tissues of the two parts must align, allowing nutrients and water to flow between them.
Importantly, not all plants can be grafted together. Successful grafts occur between closely related species, usually within the same genus. Apples, for instance, can be grafted onto other apple varieties, but not onto pears or plums. Understanding this compatibility is key to choosing the right parent plants.
How to prepare your graft
Begin by selecting a healthy, disease-free plant to act as the rootstock. This will be the base that supports the new growth. Use a sharp, sterile knife or pruner to make a clean cut in the stock. The cut should be neat and even, as rough or splintered edges can hinder healing.
Next, prepare the scion—a young shoot or twig with at least one healthy bud. Trim the base of the scion at an angle so it fits snugly into the cut you’ve made in the stock. This angled cut maximises contact between the cambium layers, which is essential for the graft to take hold.
Creating the graft union
Once both parts are prepared, insert the scion into the incision on the stock. The aim is to ensure the inner layers of each plant—the cambium—are aligned. This is where new cells form and healing begins. Even a slight misalignment can prevent the graft from succeeding, so take your time with this step.
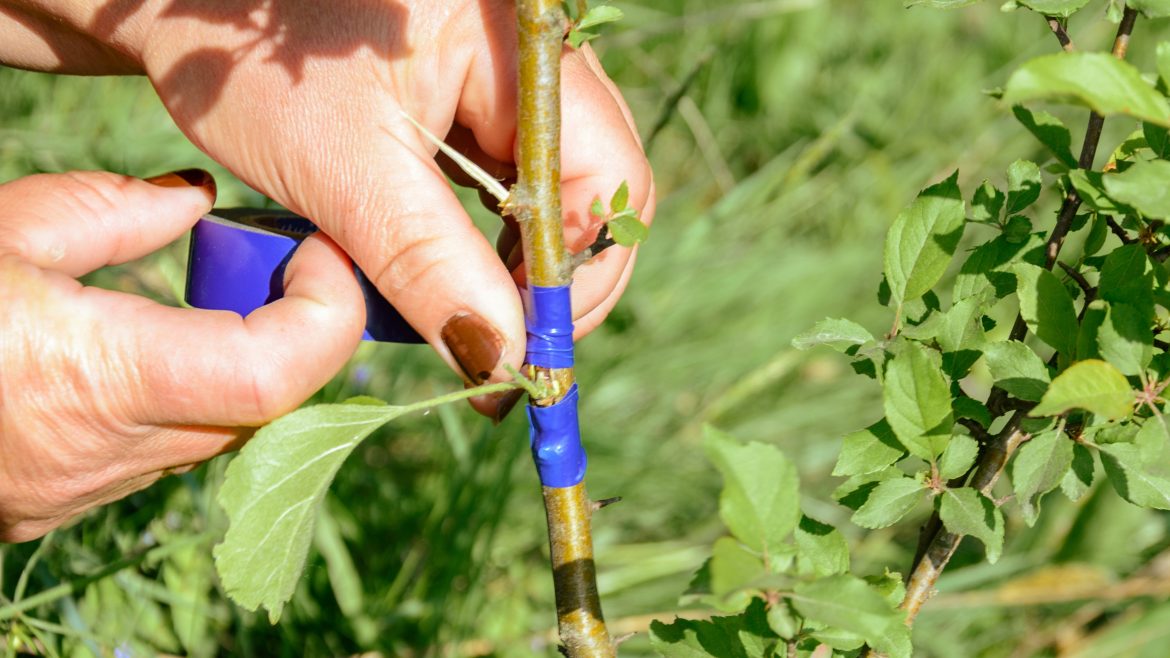
After positioning the scion, secure the joint firmly using grafting tape or strong garden tape. This holds the graft in place while the plant begins to heal. Ensure the union is sealed tightly enough to prevent moisture loss, but not so tight that it damages the tissue.
Aftercare and patience
Grafting isn’t instant. Once the two parts are joined, it takes time for them to heal and grow as one plant. Keep the grafted area protected from extreme temperatures, excessive wind or drying out. Check periodically to ensure the graft remains secure, and watch for signs of new growth emerging from the scion.
Moisture control is vital during this period. The plant needs hydration, but too much water can lead to rot. A balanced environment—cool, sheltered, and slightly humid—is ideal while the graft establishes itself.
When is the best time to graft?
The ideal time to graft is in late winter or early spring, just before new growth begins. At this stage, the plant is coming out of dormancy, which encourages cell division and healing. Avoid grafting during periods of intense cold or heat, as extreme temperatures can stress the plant and reduce the likelihood of success.
Grafting is worth the effort
While grafting requires a steady hand and a bit of patience, the results can be incredibly rewarding. From apple trees and roses to flowering shrubs, many plants respond well to grafting. The technique allows gardeners to preserve heritage varieties, improve plant health and even experiment with growing multiple cultivars on one plant.
By mastering this centuries-old method, you’ll not only improve your gardening skills but also contribute to the long-term health and diversity of your garden.
ALSO SEE:
Featured Image: Canva stock images
A version of this article was first written by Chumasande Matiwane for Garden&Home.